Looking at my previous posts, I published a link from I Love that Junk for us to have ideas on how to take advantage of the old stuff we commonly ignore. This time, I'm into checking articles on how to be creative and resourceful too! I could say I had at least tried my own creativeness from the pasts events happened in our family being the hands-on type and also to touch thoughtfulness by putting effort for your love ones.
On a personal note, here's two of those I'm pertaining about:
I. My nephew's graduation ☺
We were just so proud that my nephew Dwayne graduated and ready to enter Grade school moving for the next level! Night before the ceremony I thought of preparing for his celebration so he could feel that it was a significant event or a milestone for him. ☺


Materials:
♦ Set of assorted construction papers


♦ Graphic compass or any round objects


♦ Blue balloon

Steps:
1st: Make sure to think of the concept you want. Message, design, layout etc.

2nd: Lettering of the message. The more visible letters the better. Use your choice of colored pens, style of writing and cuts of the papers.


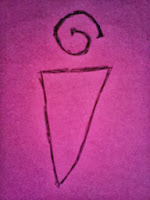
3rd: Drawing. Sketch the image you want like hearts and smiley icon (use any round object or graphic compass) then you can just layer it using pentel/colored pens to emphasize or for shading.


4th: Design. You can be creative as you can. Using the construction papers, cut it into certain length by pieces per color and use the scissors to curl it. ☺ Just twist the paper in between scissors. You can add other stuff like balloon depending on your preference.


5th: Layout. Arrange the paper messages, images, designs, etc. accordingly.


Materials:
♦ Colored Papers


♦ Colored Pens:


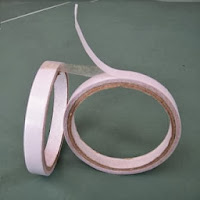
♦ Double-adhesive tapes

♦ Scissors

Steps:


On a personal note, here's two of those I'm pertaining about:
I. My nephew's graduation ☺
We were just so proud that my nephew Dwayne graduated and ready to enter Grade school moving for the next level! Night before the ceremony I thought of preparing for his celebration so he could feel that it was a significant event or a milestone for him. ☺
I was definitely satisfied with the outcome and it was all worthy seeing my nephew's appreciation of this simple present. Try this too! ☺☺☺


Materials:
♦ Set of assorted construction papers

♦ Oslo papers

♦ Scissors

♦ Scotch Tapes


♦ Pentel and colored pens


♦ Blue balloon

Steps:
1st: Make sure to think of the concept you want. Message, design, layout etc.

2nd: Lettering of the message. The more visible letters the better. Use your choice of colored pens, style of writing and cuts of the papers.


3rd: Drawing. Sketch the image you want like hearts and smiley icon (use any round object or graphic compass) then you can just layer it using pentel/colored pens to emphasize or for shading.


4th: Design. You can be creative as you can. Using the construction papers, cut it into certain length by pieces per color and use the scissors to curl it. ☺ Just twist the paper in between scissors. You can add other stuff like balloon depending on your preference.


5th: Layout. Arrange the paper messages, images, designs, etc. accordingly.


♥ ♥ ♥ ♥ ♥ ♥ ♥ ♥ ♥ ♥ ♥ ♥ ♥ ♥ ♥ ♥ ♥ ♥ ♥ ♥ ♥ ♥ ♥ ♥ ♥ ♥ ♥ ♥ ♥ ♥ ♥ ♥ ♥ ♥ ♥ ♥ ♥ ♥ ♥ ♥ ♥ ♥
II.) Mamita's Birthday Celebration ♥
The most loving mom deserves a surprise present! ☺ While she was sleeping I had a quick escape and created a birthday greeting banner for her which is not actually new because every mother's day we do this too. ☺
Her smile was priceless! It was definitely a blast!


Materials:
♦ Colored Papers


♦ Colored Pens:


♦ Double-adhesive tapes


♦ Scissors

1st: Concept. This time it's a lot simpler and I thought of a colorful greeting banner.
2nd: Writing. Since it is a plain lay-out, you could just hand-write a very stylish lettering to put a little appeal.
3rd: Image. You can add graphics or images too.
4th: Lay-out. Using the adhesive tapes, posts it on a corner visible to the celebrant and others.


No comments:
Post a Comment